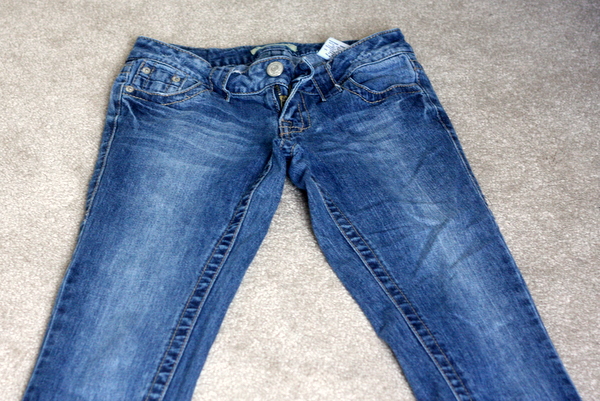
Almost two years ago, I broke the zipper on a pair of my jeans (I’ve never done this before or since, happily), and I thought, “WHAT could you possibly do with a pair of jeans with a broken zipper?”
And then I remembered that I’d made myself a pair of maternity jeans once upon a time, and this pair might be a chance for me to do it again, now that I knew a little better what I was doing.
So I stashed them away for many many months until I was pregnant again.
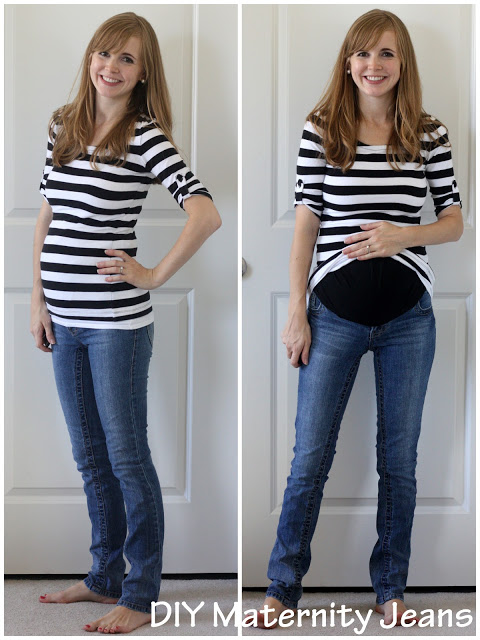
And then after I made them, I bought these maternity jeans from Old Navy for a whopping $13 and they came and I loved them and I thought, “Who would ever choose maternity pants with a panel that goes over your stomach when the low elastic waistband is so much better?”
I’ll tell you who – me. Because although I loved that low waistband, by the last eight weeks of pregnancy, I was carrying so low that my stomach was constantly pushing my pants down AND it was hard to find shirts long enough to cover my stomach, so I suddenly found myself turning to my previously unloved homemade panel maternity jeans.
Whew, why do I always have so much to say before I get to the actual point? Do I think anyone REALLY needs that much back-story (no, but I can’t help myself).
Either way, it was really pretty simple to make these and since I already had the jeans AND a hole-y tank top, it cost me about $2 for elastic and nothing else. Beat THAT, Old Navy.
how to diy maternity jeans
- Jeans
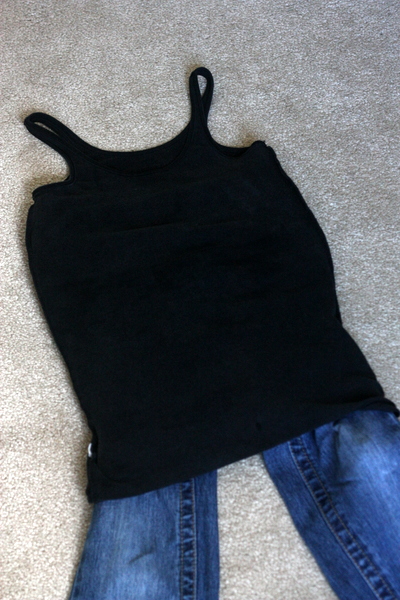
- Stretchy t-shirt or tank top (the stretchier and thicker the better).
- Elastic (I used one about 1.5 inches thick)
- Your usual sewing supplies: sewing machine, thread, pins, scissors
Note: I struggled with my first pair of homemade maternity jeans because they kept slipping down – I did two things to counteract that on this pair. First, I didn’t cut the back at all – I left the entire back waistband intact. Second, I put elastic at the top of the stretchy fabric to help hold them up. Full-length denim is just too heavy for the jersey to keep up on its own.
Lay out your jeans out flat. This is a very difficult step. . .
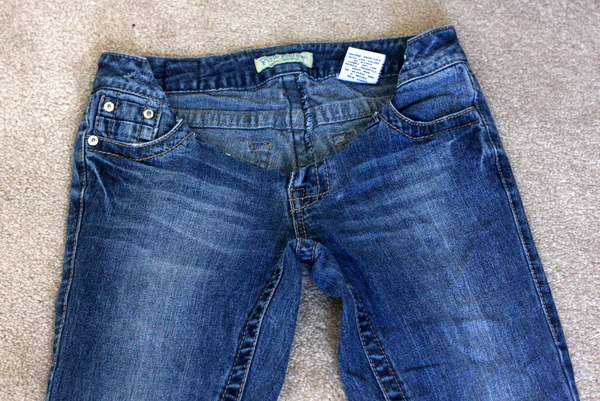
Carefully cut a half circle that gets rid of most of the zipper, the metal rivets at the top of the pockets (I didn’t do this last time and broke my needle when it hit one of them), and the front belt loops. Don’t cut any lower than you have to, because the lower you go, the longer the shirt you’ll need to cover your stretchy fabric.
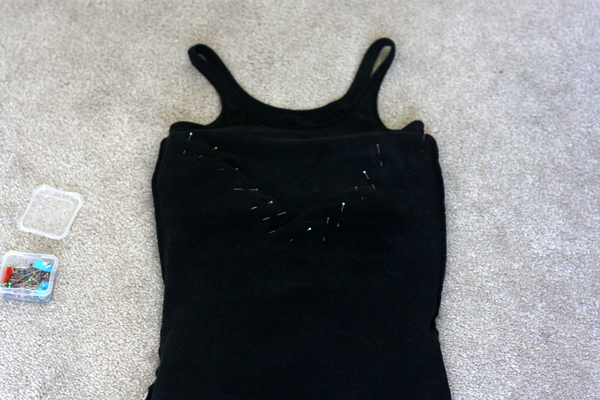
Turn your shirt or tank top inside out and slide it down over the top of your jeans (so your jeans are inside the tank-top) as far as it will go.
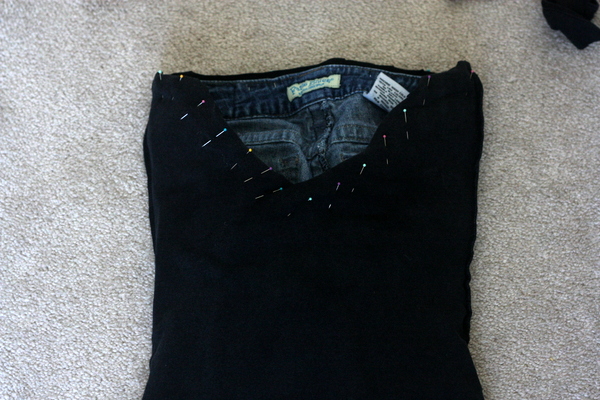
Pin the tank top along the half-circle cut out you made on your jeans.
Cut away the top of the tank or shirt so that it lines up with the edge of your jeans all the way around.
Using a tight zig-zag, sew the two pieces together all the way around the opening (where you’ve pinned and then around the backside too).
Remove your pins and ta-da! Maternity jeans.
But maternity jeans that will probably slide down every ten seconds. Very bad. Let’s add some elastic.
Try your jeans on and pull the tank/shirt part up as far as it goes. Mark about two inches above where you want them to hit on your stomach (if you’re making them early in your pregnancy, be a bit generous).
Take the jeans back off, and carefully cut off the top off the shirt where you marked.Turn your pants inside out.
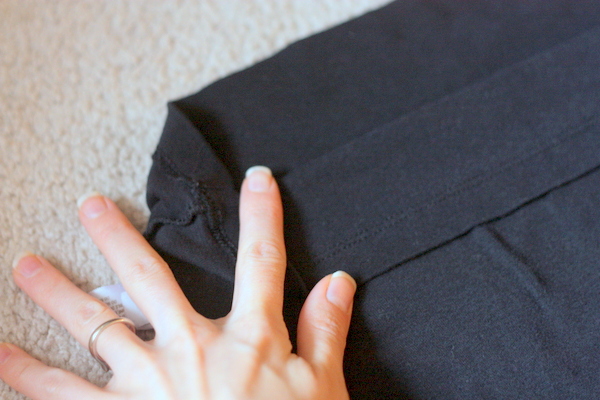
Fold the top edge of the shirt over about 1.75 inches (if you’re doing 1.5 inch elastic. If you’re using a different thickness, adjust appropriately).
Pin it in place, and carefully sew shut with a small zig-zag stick all the way around, leaving a three inch opening on one side so you can insert the elastic.
Wrap your elastic around the top of your stomach and cut to your desired length, leaving an extra inch.
Pin one end of the elastic at the opening, thread the elastic through and then overlap the two ends and sew them securely together.
Sew shut the opening and trim any loose threads.
Ta-da for real!

I think the make-your-own jeans are brilliant, and wish I had had this post back when I needed such jeans. And I am amazed that it is really pretty easy to do, and they look great. Bravo.
It's so funny how people have totally different comforts when pregnant. I have given away or simply thrown out every single pair of maternity pants that DOESN'T have a full panel. I absolutely hate the low elastic waist band at every single point of pregnancy and post partum. Crazy, right? And disappointing, because some cute maternity jeans only come with the low waistband. Sigh.
I'm seriously impressed that you make your own maternity pants. I made an attempt last year and it was a flop (and I was glad it was with old unloved pants and an old undershirt. Go you for making two pairs and having them both be a success!!
I mostly want to know where you got that shirt. Cause, you know, not planning on any more babies and I have no sewing skills. Though I will add a vote here for the panel during the end of pregnancy.
Brilliant and almost too easy. If only I had jeans I wanted to cut. I have like 10 pairs of jeans from over the last several years (and I like them all), but they don't all fit and I don't want to get rid of any of them because my body apparently changes so much, what if I will fit them again?! I weighed considerably less after having a baby than I did before, but what if this time I don't? I'm 15 weeks and in that horrible phase where I'm in between all the sizes. Boo. Now that was more than you needed to know.
Sometimes you can find great jeans at consignment or thrift shops and then if they're cheap and fit great turn them into maternity pants! I also hit up old navy clearance a lot during the pregnancy – and gap clearance – both have great clearance deals on maternity pants occasionally (I got two pairs for $5 total at gap last time around!)
A kind of completely unrelated thing. Old jeans also make awesome quilts! My mom made me one for Christmas and I love it!
This is SO smart! I'm pinning this to use later. So many maternity jeans are ugly — and this way you can make your own with cute jeans! 🙂
This is genius! I'm going to have to remember this. =]
This is great… however, my butt and legs also balloon up a bit too much to think my cute skinny jeans will work at any point past the 5-month mark of pregnancy!
How exactly do you take care of the zipper? Since you're not cutting all out, do you zip it up them cut, take the zipper out and sew the fly shut? Thanks so much for this tutorial, I'm working on a pair right now 🙂
Since the zipper was broken, I couldn't zip it up, so I cut out just about all of it (I'd say there was 1/4-1/2 an inch left at the very bottom).
I did something similar to this with some of my hubby's old jeans and a tank for a jean skirt. I turned the jeans upside down, so the waist was at my knee, and the hem was at my waist. Then I used the tank, one size too small, to do the panel. That was my favorite jean skirt, especially at the end of my pregnancies.
This is a great tutorial. Thanks for sharing!
This is GREAT! 2 Questions though: did you actually remove the whole zipper or just cut through it? And did you remove the belt loops in the back or just sew through those too? I have a pair of jeans with a broken zipper I can't wait to try these on!
I just cut through the zipper (although there was really just about 1/4 inch left or so at the very bottom). And I left the belt loops on and sewed right through. good luck!
This is brilliant! If I ever have a 2nd baby I am definitely making my own maternity pants. I literally wore the same two pair of jeans my whole pregnancy with my son.
I followed your instructions and "fixed" a pair this morning. They're very pretty and make me happy. Maybe some year I'll post photos!
I just tried this on Saturday with some jeans with a broken zipper and they turned out amazing!! Such a great tutorial and I'm so happy with the jeans!!! Thank you so so much!
Thank you so much for posting this. I’m going to try this on a pair of scrub pants for work because buying them new is too expensive, especially because I’ll only wear them a handful of times! I tries looking online for elastic to add at the top but it wasn’t big enough. The old tank idea is genius!!!
I tried this just now on a pair of shorts and it worked perfectly – finally some comfortable shorts 🙂 I used a belly band I had been given but didn’t need and I didn’t cut it, I just pinned it round the shape I had cut at the front. Thanks for posting.
Question. Do you find the back of the jeans where you didn’t cut has a really thick seam now? (As when you would pull the shirt part up, it would cause the seam to roll down?)