The first owners of our house appear to have been pretty hard-core DIYers.
The living room/dining room in our house has two of the four walls almost entirely covered in stone that they installed themselves (and, to be fair, they did a pretty decent job).
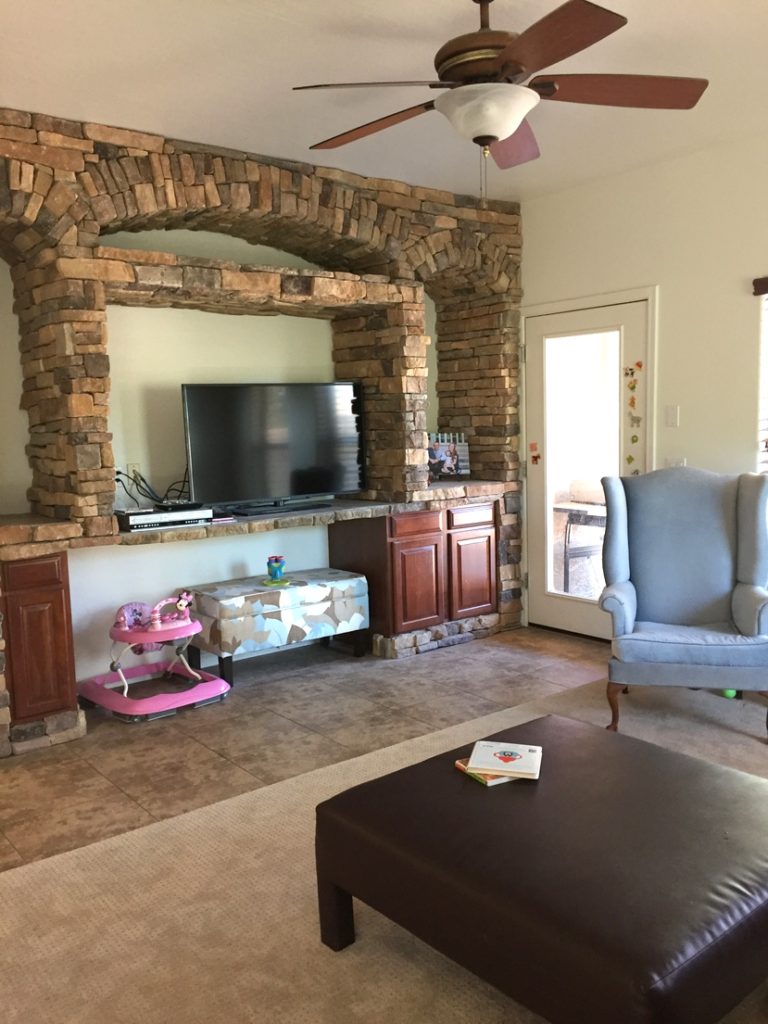
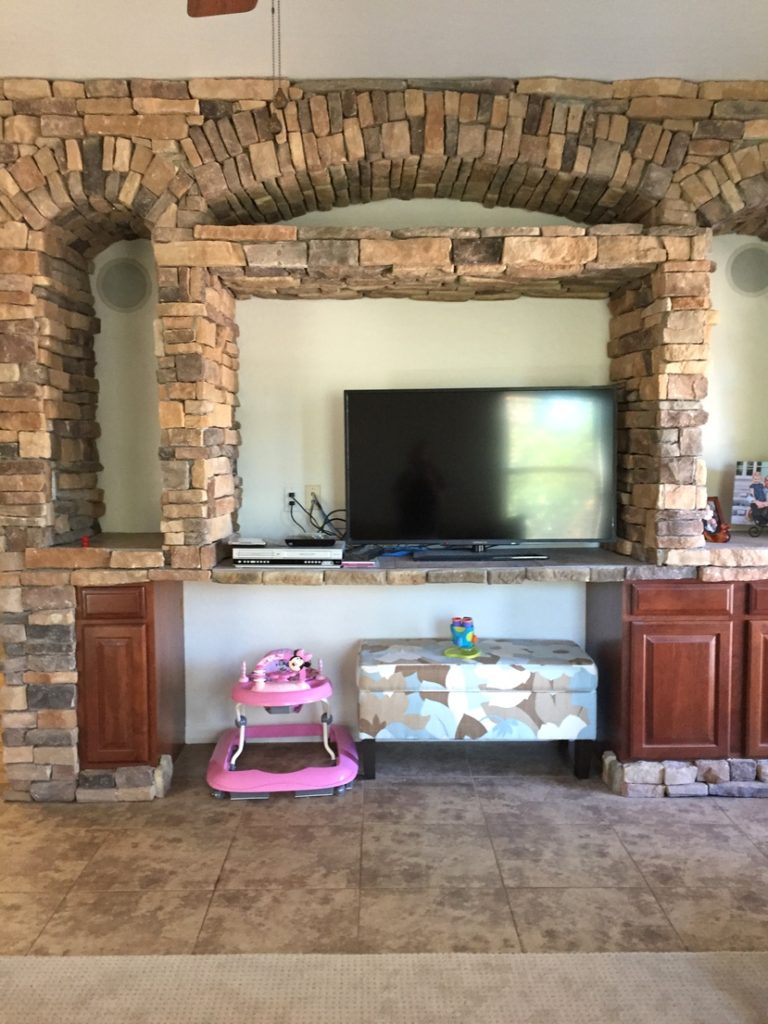
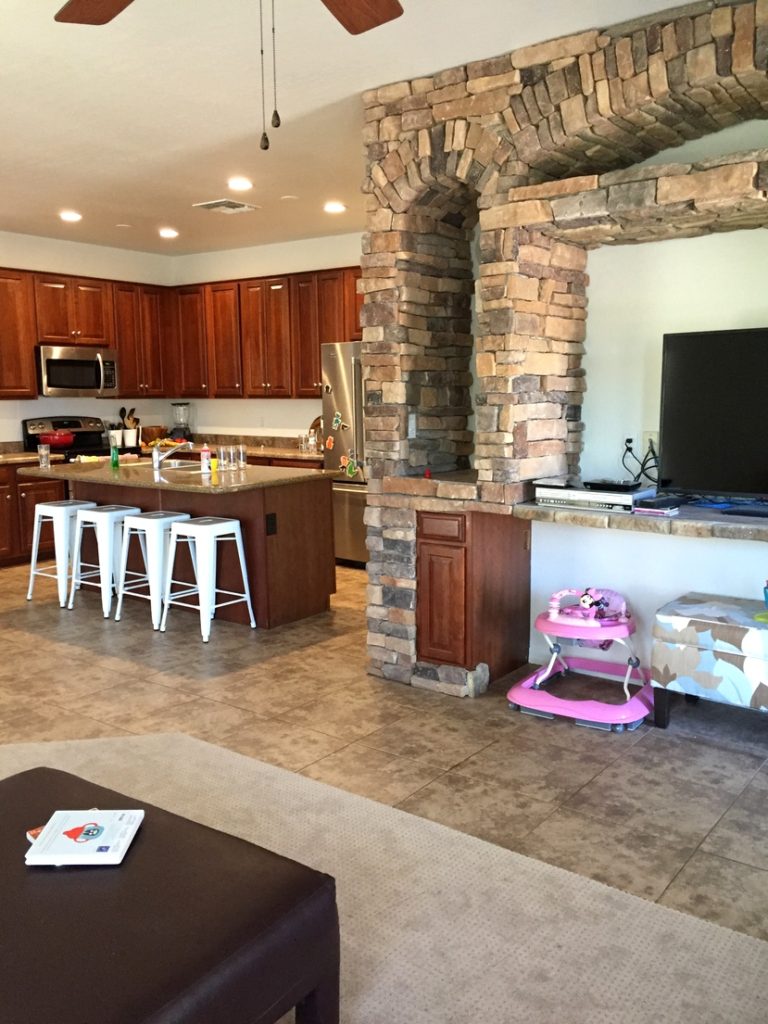
In the family room, however, they used the same stone to build an ENORMOUS stone entertainment center. It was more than two feet deep, ran twelve feet long and went up to the top of the nine foot ceilings. It was a beast.
It was also completely asymmetrical.
Someone in the neighborhood informed us that these folks had gone around the neighborhood with a little wagon when most of the houses were still under construction and scrounged up the stone from various building lots. They speculated they’d probably scavenged the cabinets too, which explains why they were so differently sized.
It overpowered the entire room, made it all feel dark and heavy, and looked just terrible because the TV was WAY too small for this giant space, the whole thing was misaligned and there was nothing you could really put in the bottom opening that didn’t further accentuate how off-balance the entire thing was.
It was basically a disaster.
For more than a year, we’d casually tossed around ideas about what to do in that space, but the idea of tearing out this whole thing was a little overwhelming and we didn’t know what condition the wall or floor behind and below it would be in.
If we tore it out to discover that we had 26 square feet of tile that was completely broken or removed, that was going to be a bad surprise, since we had no extra tiles.
From the beginning, Bart had wanted to do a big built-in unit, with cabinets on the bottom and shelving on the sides. My parents have a similar set-up in their home and it’s beautiful.
But this wall was right by the main wall of kitchen cabinets, and I wasn’t wild about having SO MUCH cabinetry for a 30-40 foot stretch. So I was definitely not on board with this plan.
Also, this was a really pricey way to go.
Over Labor Day weekend, Bart found a place that did built-ins and we went in to get a quote. An hour later, we marched out with a layout and a quote for $8000 (this was 20% off because of the holiday. If we didn’t purchase it right away, it’d go up around $10,000).
The good news about this insanely high price was that it was an easy sell to convince Bart that this might not be the right way to go.
The bad news is that I felt completely defeated by this stupid entertainment center.
We came home that afternoon and used the IKEA kitchen planner to try to draft out our own version, but we just couldn’t get it to work, and it was still reasonably pricey (although. . . not ten grand pricey).
I was ready to just give up entirely, but Bart said, “Well, who cares what we do? Either way, we know this thing has to come down.”
And so he set off to the hardware store to buy a crowbar and a sledgehammer, and an hour later, he was pulling this beast down.
We put the stone up on Craigslist for the whopping price of free and just as Bart finished taking it all down, two guys with a trailer showed up and hauled every bit of it away. It was a happy moment to be sure.
Bart removed the 2×4 structure that had held it all up and we took it and the cabinets out to the curb where bulk trash was conveniently scheduled to pick it up that weekend anyway. By the time we went to bed, the whole thing was out of the house and we discovered that the wall was only marginally damaged and the tile was untouched.
On Monday morning, Bart repaired the holes in the drywall, installed a new strip of baseboard (that was the only thing they’d ruined when they put this thing up), and we repainted the whole wall.
It was unbelievable how much bigger and brighter the room suddenly felt.
Now I was even less thrilled about the idea of putting in an enormous new built-in because I didn’t want to give up all the space we’d just gained back.
Instead, I started trolling Pinterest looking for shelving options that would work.
My goal (on the whole house, really) was to make it look as good as possible without spending more money than we had to.
But then it turned out that finding 11-foot living room shelves was VERY difficult.
Also, we discovered we are something of bracket snobs. Everything we looked at seemed to belong in a garage or the home of a person born before the Great Depression.
Defeat, Round 2.
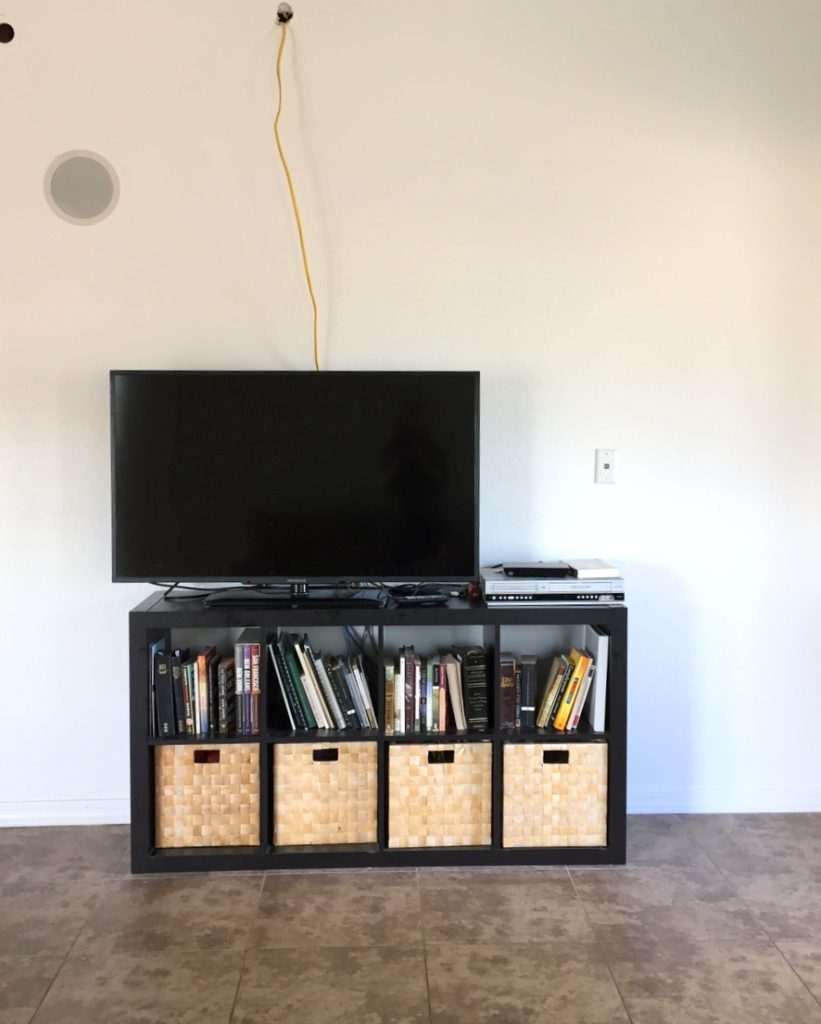
I was pretty sure the tiny IKEA bookcase that we’ve dragged around the country was going to end up there, holding our TV and looking stupid until I was 50, which didn’t thrill me a bit.
(One of my neighbors, who knew we’d torn down the stone DIY beast, stopped by, looked at this pathetic setup and said, “Oh, is this what you decided to do with the space?” and I couldn’t decide whether to laugh or cry, because it looked so bad).
Anyway, we just ignored the whole thing for more than a month and then, when I was at my friend Becky’s house, she was getting a fireplace, cabinets, and shelving built into a blank wall in her family room, and I inquired about both the cost and who was doing it (because I’m nosy like that) and she started raving about this carpenter they knew and how affordable he was and what great work he did.
And the next day I called him and said, “What would it cost me to get 11 foot living room shelves?”
Five minutes later, he called back to say, “$17 a shelf for materials and $100 for me to pick out the wood, mill it, and deliver it to your house.”
Solid wood shelves delivered straight to my door for $200 and in exactly the lengths we needed? I was in. This guy was basically my new best friend.
We went to Etsy and found some industrial-looking brackets we really liked and ordered a whole set of them, and then waited for everything to arrive.
When the wood came, Bart and I spent two nights staining the pine shelves (which took about 40 minutes each evening, so this was a quick, simple job), and then, when my brother-in-law was here for Thanksgiving, he and Bart installed everything.
We’d spent a bunch of time before we ordered the boards figuring out dimensions and spacing – there was an Excel spreadsheet involved, as there is when your husband used to be an accountant – but once we actually were ready to install them, we discovered that the studs were oddly spaced and that in order to clear the electrical outlets near the floor and not cover either of the speakers, which were misaligned by several inches (have you noticed a reoccurring theme about these previous owners not being very exacting in their DIY projects?), so there was a significant amount of recalculating, measuring, and discussion over the shelf placement.
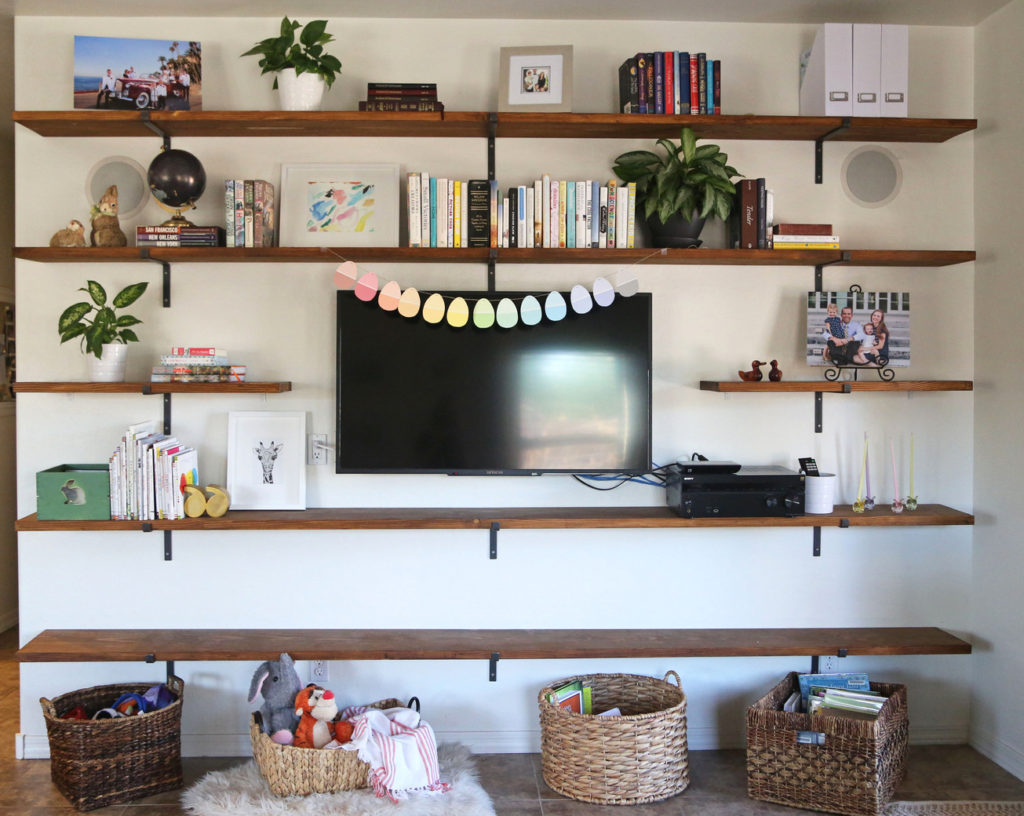
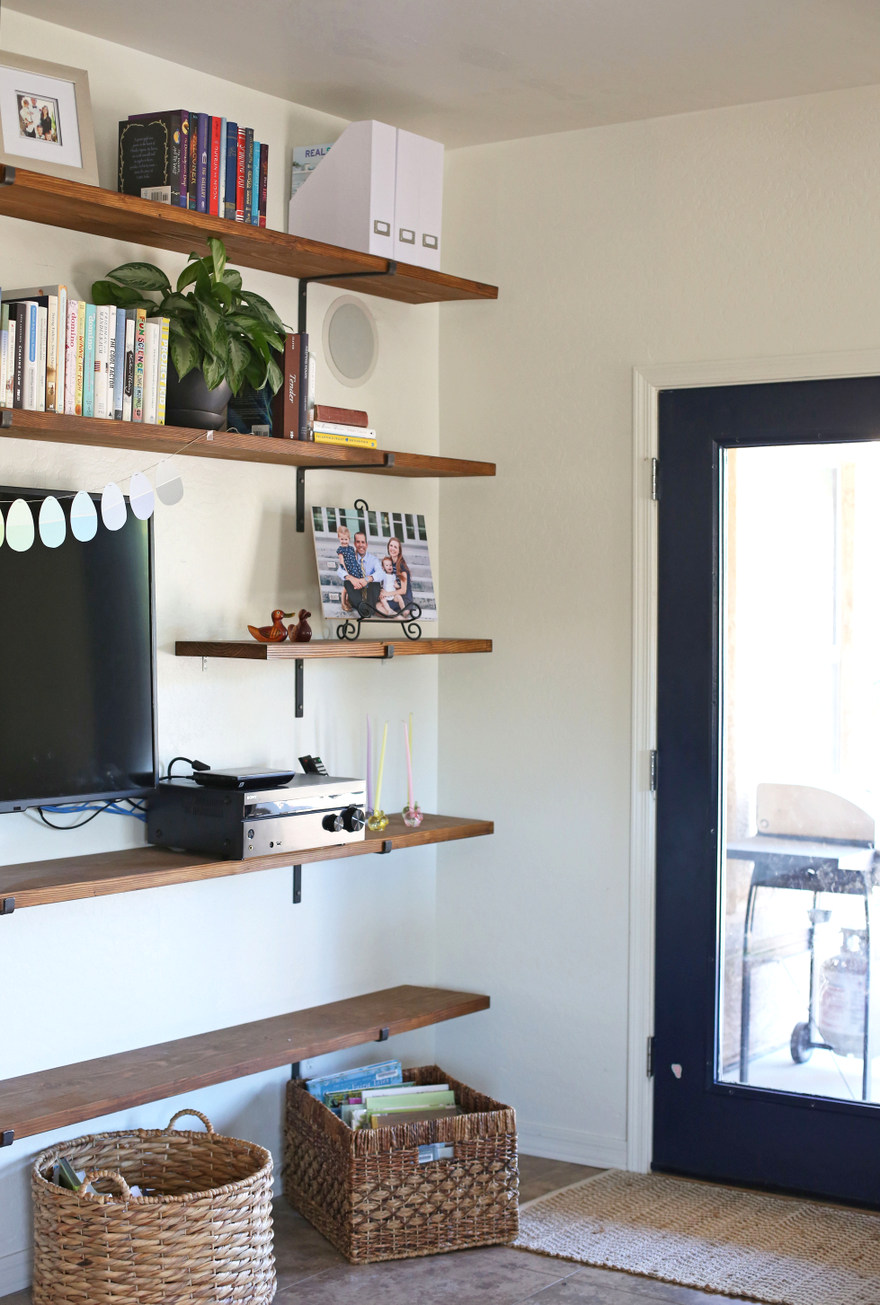
Originally, our plan had been to have two full-length shelves along the top, then two sets of short shelves flanking the TV, and then another two long shelves, but eventually, we decided to ditch the second set of short shelves and make the spacing a little bigger to make it work.
And we’d planned to do 4 brackets on each long shelf and 2 on each short shelf, so we’d ordered 24 brackets, but then with the stud placement, we ended up doing 3 per long shelf and just one on the short shelves with smaller, mostly-invisible brackets to stabilize them (so we ended up with ten extra brackets that we’ll have to find some other use for).
When the whole thing was up, it was insane how much better it looked. I was so happy with the feel it gave to the room, the way it filled up that big wall, and the fact that it’d cost (even with all the extra brackets), only about $600 instead of $8000.
The next night, they mounted the TV, which basically made all my wildest dreams come true because it looked so much cleaner and streamlined, hooked everything up, and we finally could use the speaker system that had been sitting unused for the past year and a half.
Basically, I’m in love with how the whole thing turned out, how inexpensive it was, and what a huge difference it’s made to the entire feel of the room.
And there is 10 times more than you ever wanted to know about a couple of living room shelves.

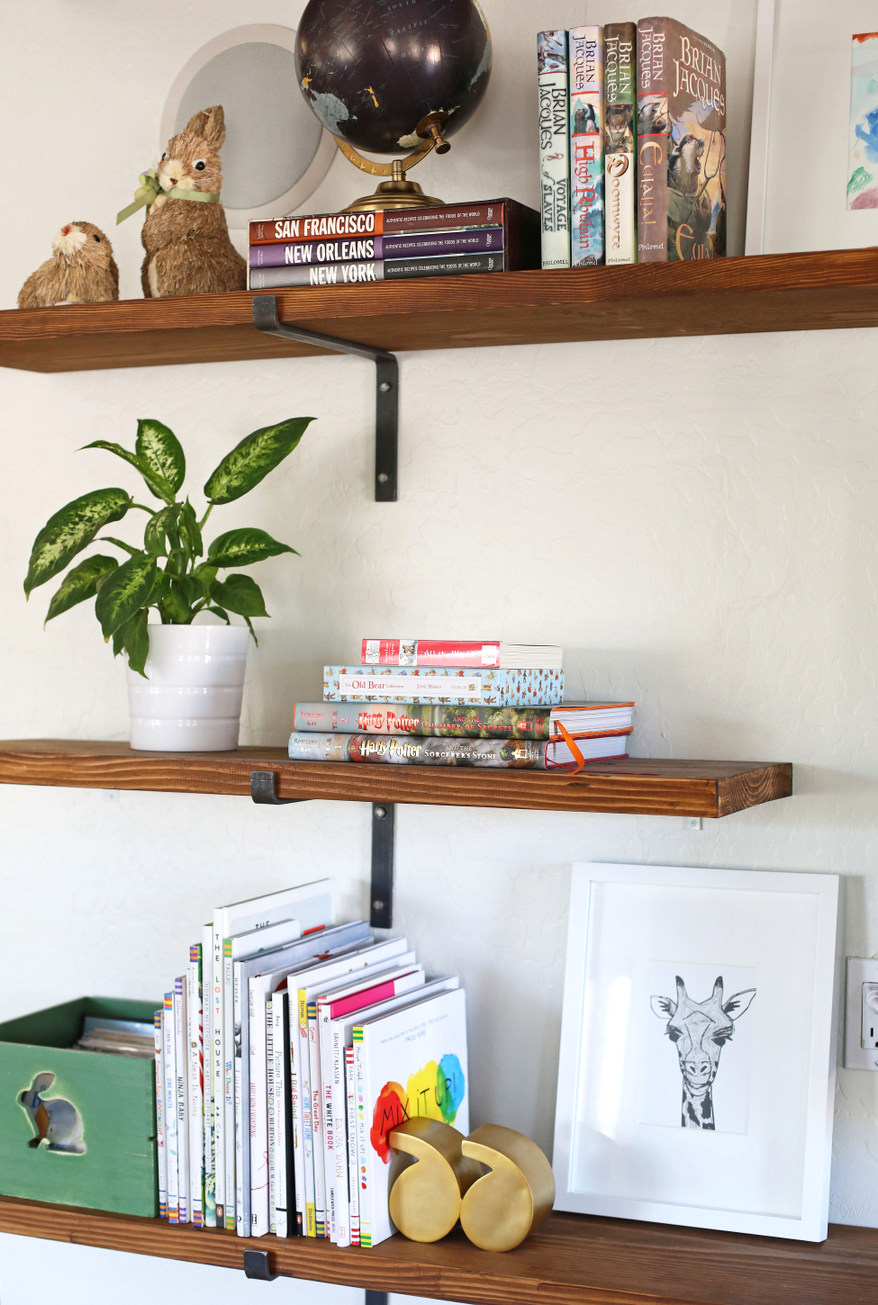
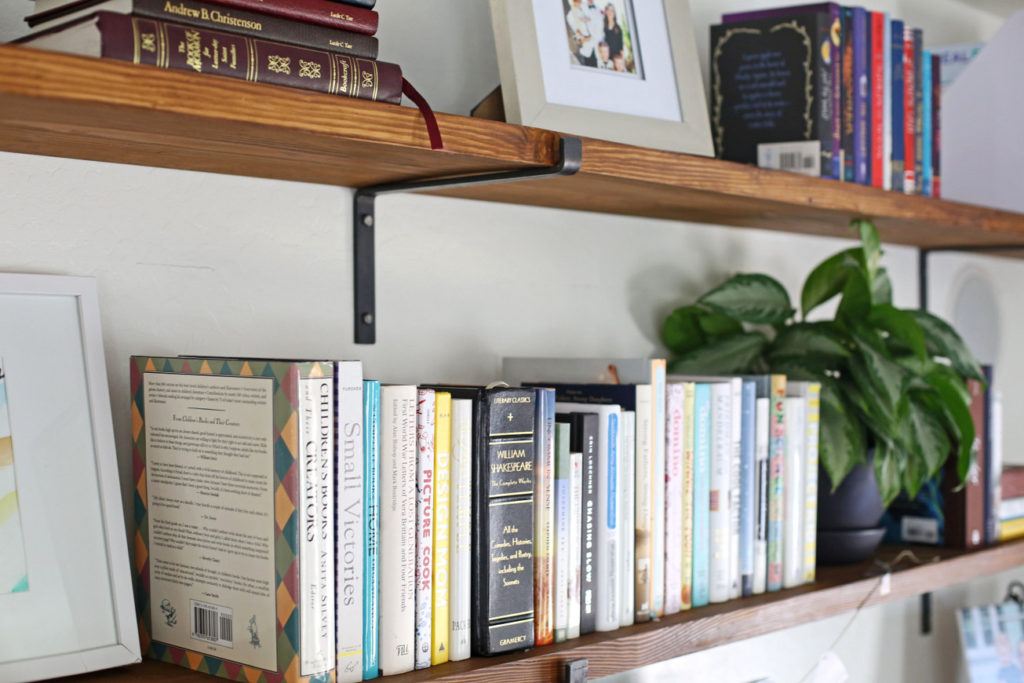
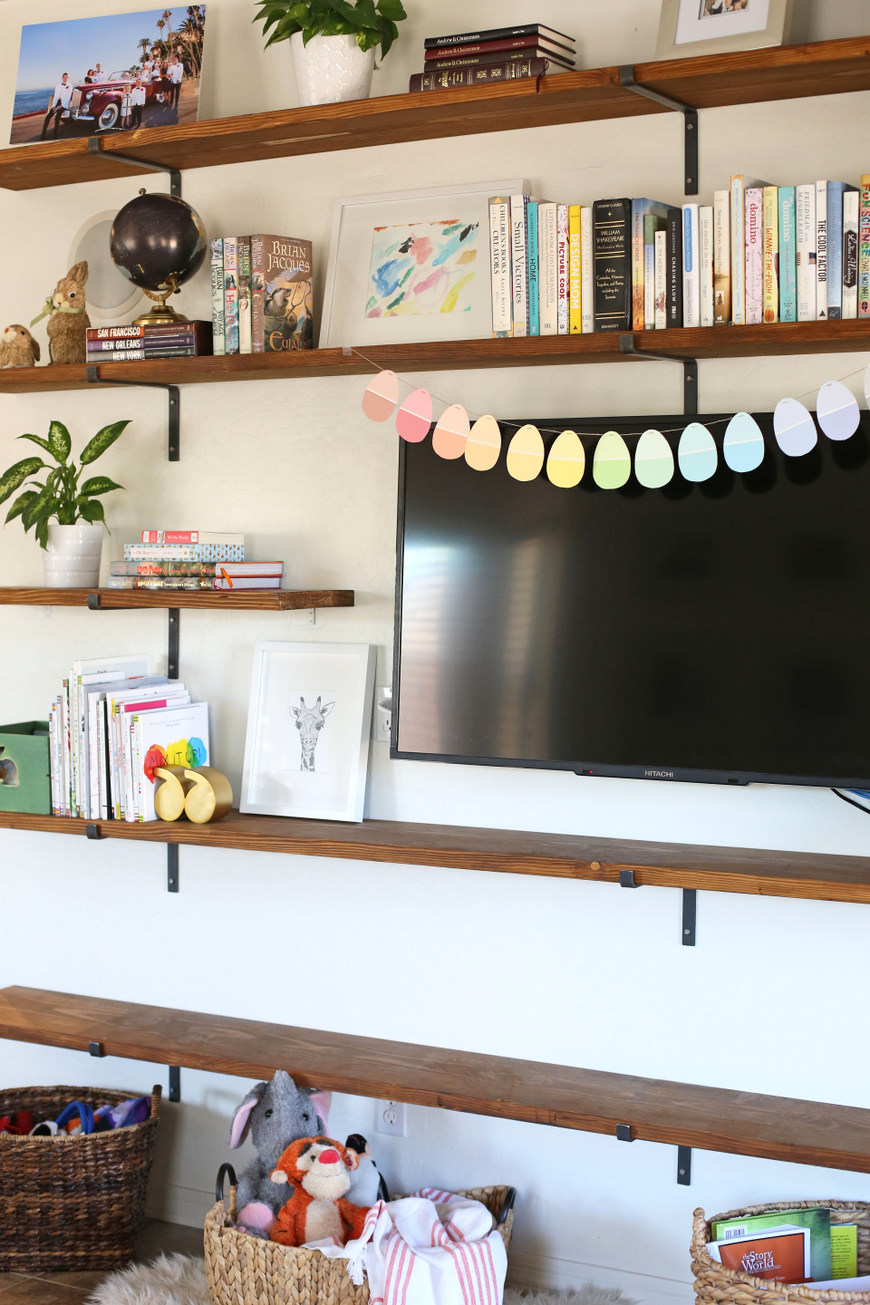
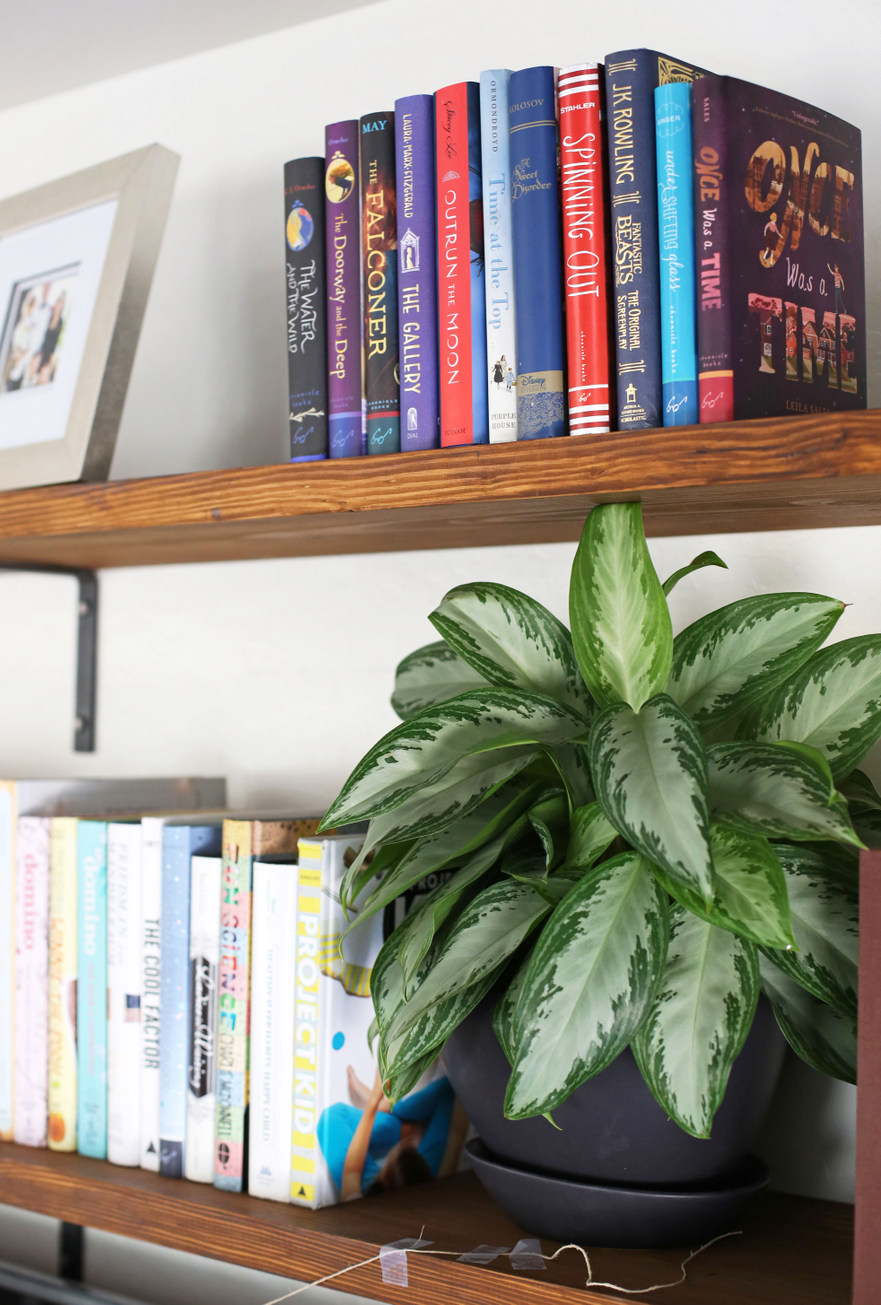
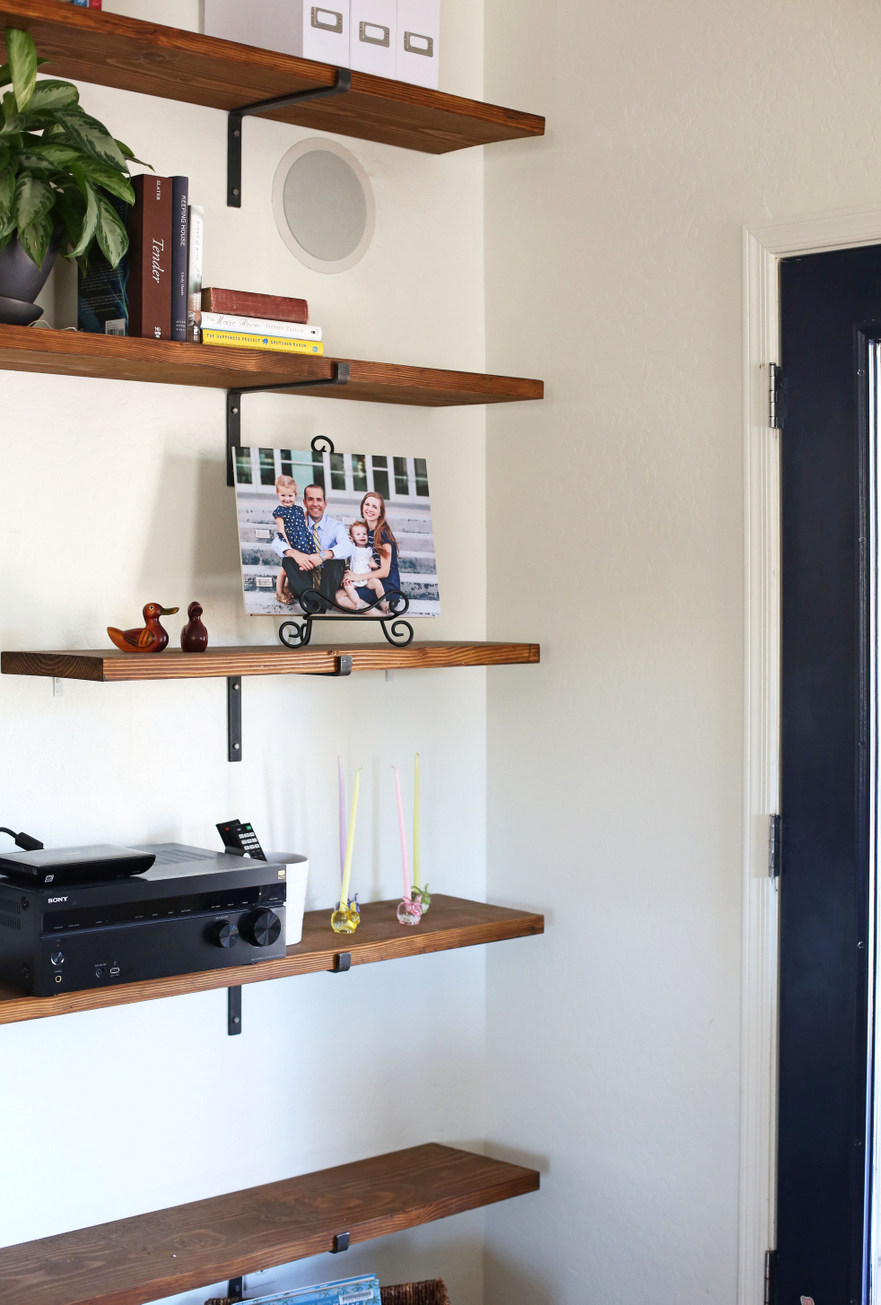
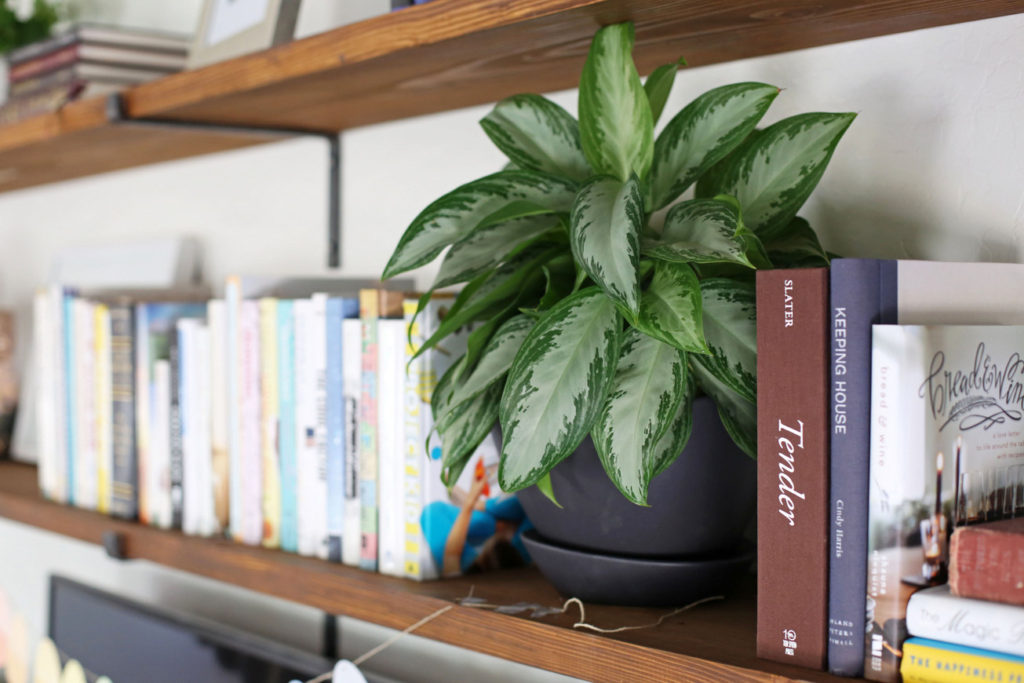

Wow – what a HUGE difference! It really does look so much lighter and brighter and so clean and modern.
GREAT job! Our house is really old, so we have the exact same problem when we go to re-do something. Once you start tearing things out, you never know what you are going to find. This was the exact perfect thing to do with that space. It’s cool that you can change up the decor and books on the shelves as the seasons change or you get bored and you’ll have a whole new look.
Your house with its ambitious previous owners and weird paint colors sounds a lot like my house, except yours doesn’t have a parrot tile backsplash. It makes me feel hopeful when I see how cute yours is turning out, because maybe mine will look cute someday too. 🙂
Parrot tile backsplash? You win everything.
They look really great! I had no idea all that stone had been there.
Do you recall where your small globe is from? I’ve been looking for one for a while but they tend to be super expensive!
Yes! It’s from Target (here’s the link: http://bit.ly/2puKM7q) and it’s only $15.
so great! it really changes the room! and nice that it’s not all custom built for a specific type/size/style of tv, so when things change again (think ’80s entertainment centers), it will just be a matter of moving things around and filling holes/painting.
They turned out amazing! I’ve been dying to see the final product for months now! You guys really did an awesome job. I don’t think we would have been brave enough to just rip out all the stones, but totally worth it for the end result!
I am SO impressed by this! I can’t believe what a transformation it made. We’ve been in the same boat with having to figure out how to update the house we bought (good condition, the space we wanted, but just some less-than-appealing finishes ;)), so I am loving seeing everything you guys have done!!
I’ve been waiting for this post as it is exactly what I’ve been wanting to do in my house. What kind of spacing did you end up with between shelves? Is there an Excel sheet that I could peek at to give my own husband some instruction when he start building?
HUGE improvement and I love that you could do it for (fairly) cheap! I’d LOVE a whole wall of shelves like this but I don’t think they will fit anywhere in our current house!
That is beautiful!!
You are so wrong – I loved this post! Can you show a picture of the new wall with shelves that also shows the kitchen, like the one when the stone hideous beast was still there?
You have great taste J 🙂 xx
Turned out great! What a project. I’ve learned that we would never do well with DIY renovation projects, neither of us are motivated enough. I tend to hate all the brackets too! Shelves are SO hard! I’m still tweaking mine and looking for new things after 3 years.
Looks great! My husband is in love with Excel too – he’s a chemistry professor. No problem a spreadsheet can’t solve! ?
looks great! Last year I took out the big shelving units in my living room and installed shelves similar to yours. I am still in love with the results. My living room looks and feels a million times bigger.
It looks so great!!! Totally a great solution for a book-loving family. I love having our TV mounted on the wall too – such a space saver!
So…basically, I am just copying every single design decision you have. This kind of open shelving is EXACTLY what I want in our living room….I just may be asking for Mr. Carpenter’s contact info! 🙂
xox
How strong do you think these shelves are? I.e. – would you put your entire book collection on them? Or are they more for decorative purposes? I want something like this in our home, but I want it to be strong enough for all the books! Wondering what we would need to do to make them strong enough…?
I felt like they were pretty strong (we put the brackets into studs), but if I’d planned to put my whole book collection on them, I think I would have done more brackets. Probably 5 instead of 3. We always planned for them to be more decorative since we have a lot of book shelves elsewhere.