“Looks Like Lenny’s Going Fishing”
A friend of mine recently hosted a little busy bag exchange (she used this sign-up spreadsheet which happened to be made by a blog friend, Emily Kate), and I made little fishing kits with magnetic fishing poles and felt fish in many colors.
I wanted something that wasn’t very expensive and also wouldn’t be really time-intensive. This project? Perfect.
Should you feel like making some as well (and who DOESN’T want to spend an evening making felt fish?), here’s how I made them.
DIY Magnetic Fishing Game
- Felt
- Straight Pins
- Washers
- Twine/yarn
- Magnets
- Unsharpened pencils
- Template
- Hot glue gun
- Sewing machine (optional)
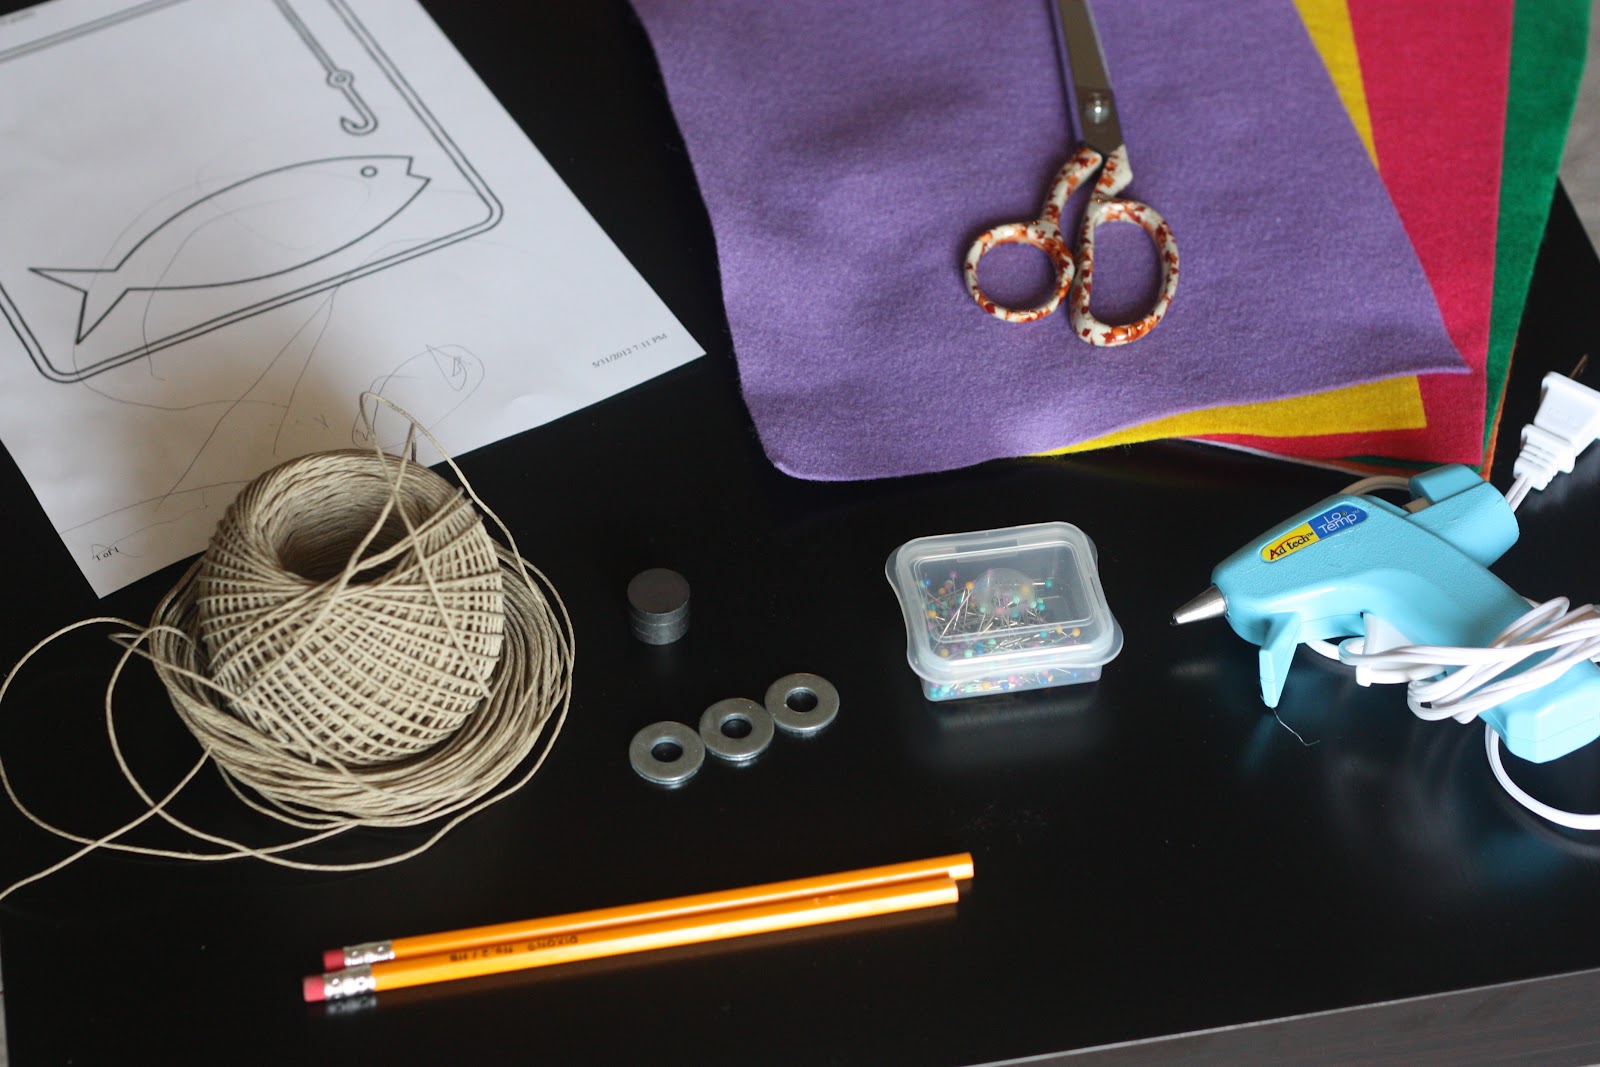
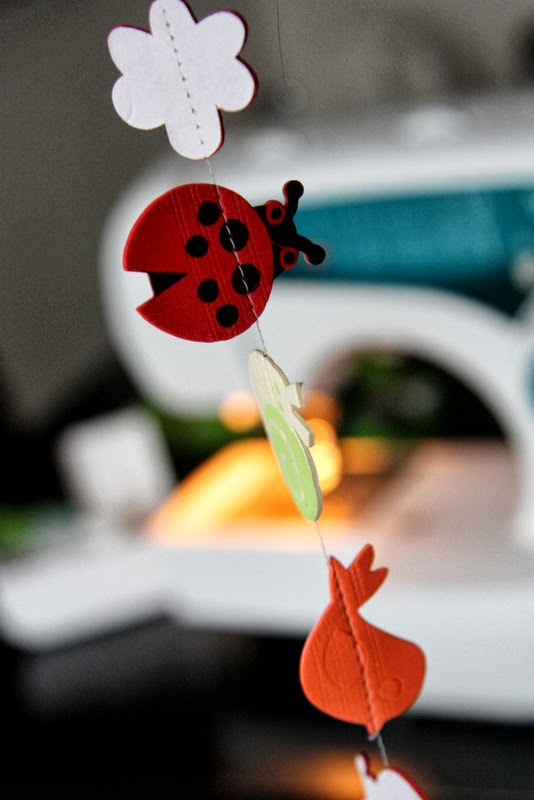
I bought a big pack of 8½ x 11 sheets of felt in various colors, then folded them length-wise (or hot-dog style) and cut four sets of fish from each one (I used this template and resized it to fit on a single page when I printed it).
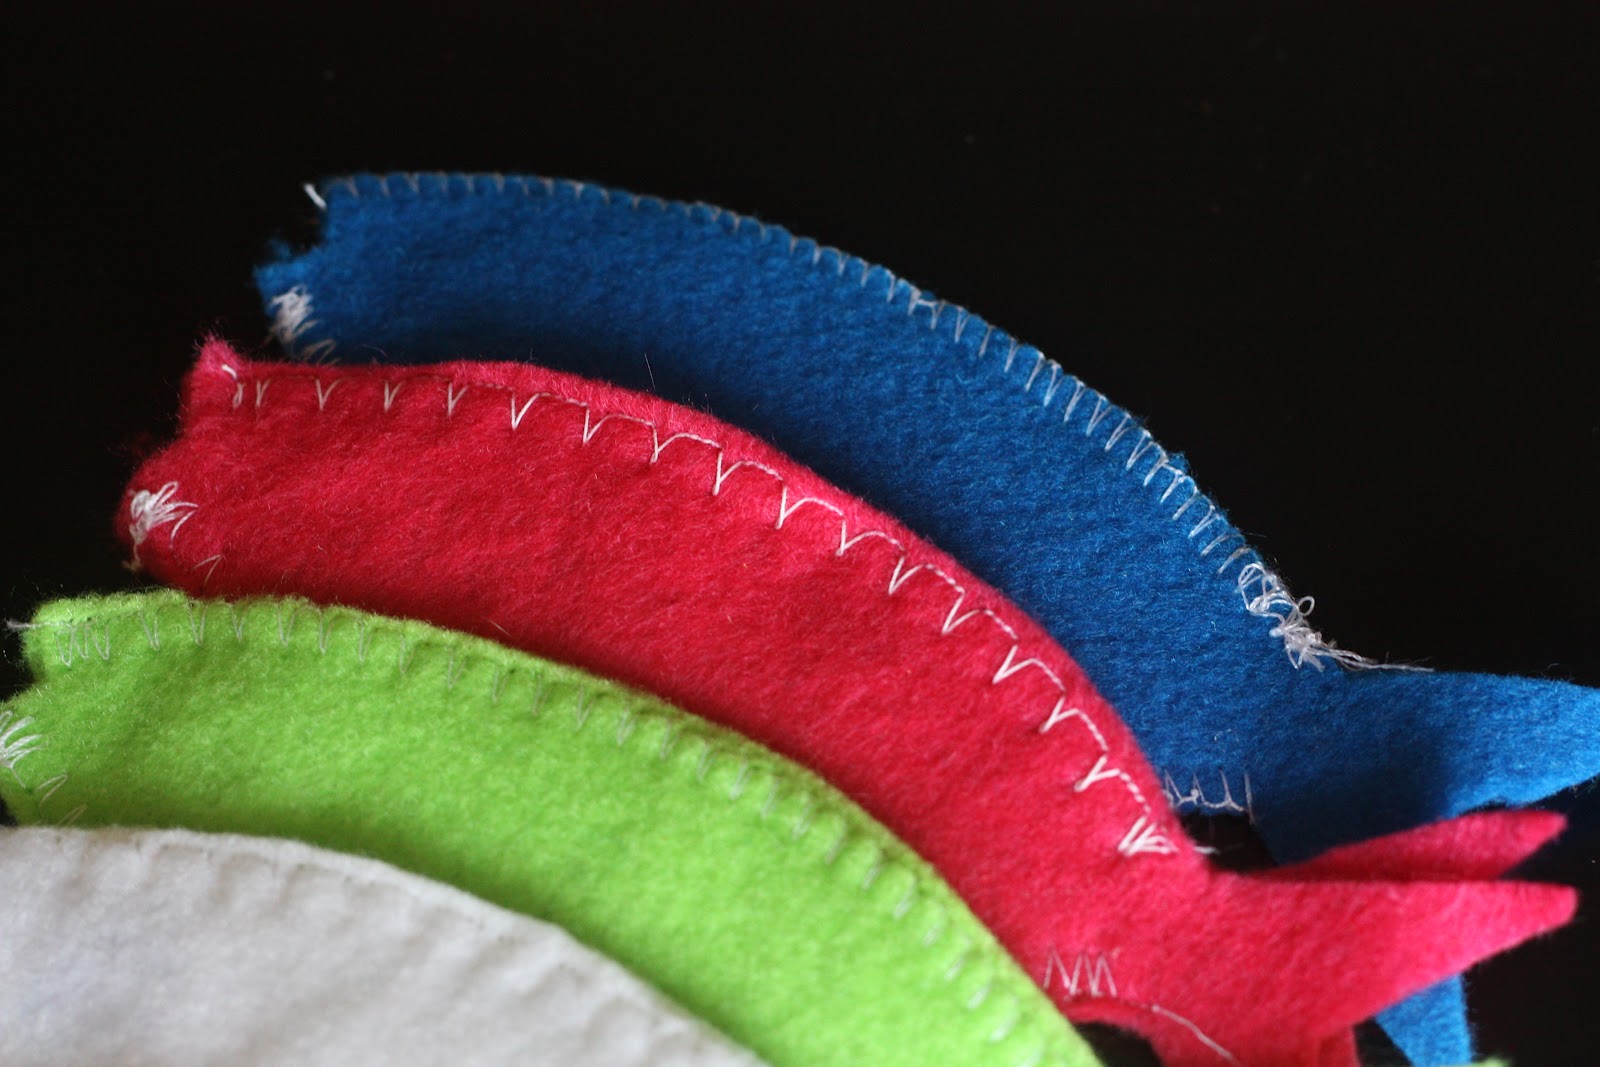
I hot-glued (and had to BUY a hot glue gun for this purpose) a small washer in the center of each one. (Ella, by the way, is obsessed with the washers. Any time she picks up these fish, she feels for them adn then proudly exclaims, “WASHER!” I guess her life is a little dull).

Then I used bright white thread and set my machine to do a slightly interesting stitch (although a zig-zag works as well as anything else) and sewed around the edge of each one. I was worried if I hot-glued them that they would just come apart and that they wouldn’t look quite as nice, but if you are a less paranoid kind of person than I am, go ahead and glue.
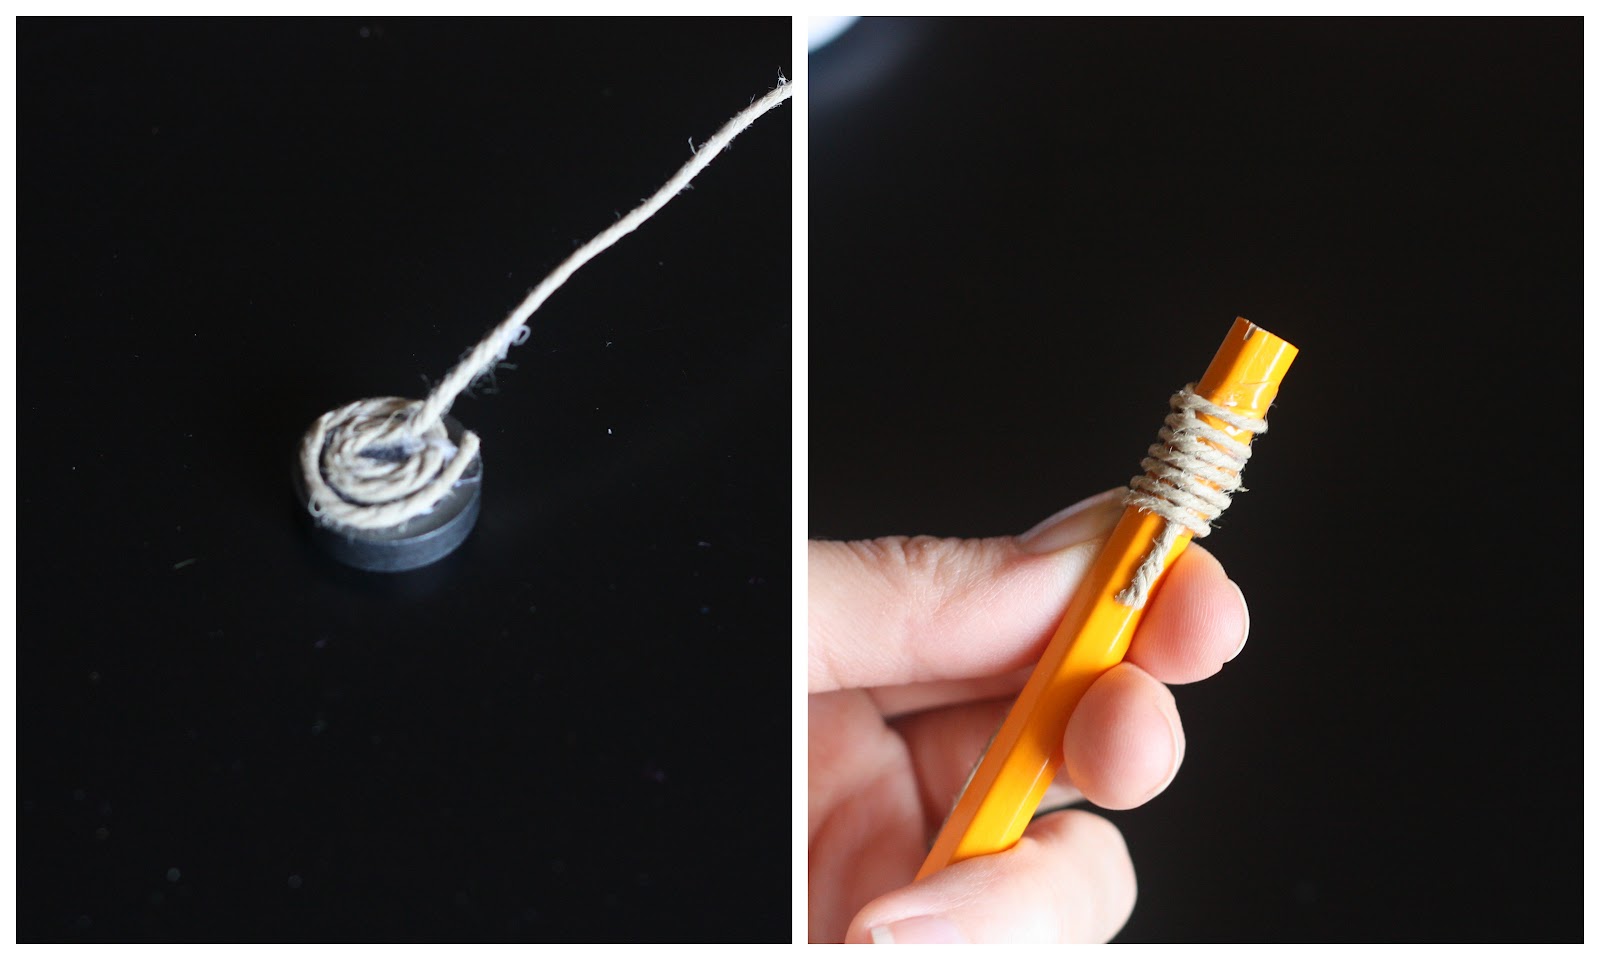
For the fishing rods, I bought a pack of pencils, glued and wrapped some twine around the un-sharpened end and then glued the magnet to the other end of the twine.
The first set of magnets I bought at Wal-mart were WAY too weak. I ended up buying a heavy-duty set at Office Max for about $4. Because I love making multiple trips for one project.
Obviously if the magnet comes undone, it’s going to be a choking hazard. So, you know, supervise and all that jazz.
Ella has really enjoyed them. She likes to put them all in a bowl and then tell me what color to fish out, or have me ask her the colors. Sometimes we scatter them around the room and she has to retrieve them all.
You could also attach clothes pins with various numbers and letters to them and have them select them based on that.
And then feel awesome that your child has a handmade toy. And ignore the fact that they probably still prefer the plastic, flashing toy you picked up at a garage sale.
This post is sponsored by Disney Baby. I’ll be joining the Disney Baby blogging
team next month, and look forward to sharing these kinds of stories
(projects/ideas/etc) with you over there! Stay tuned for more details!
It was very smart to sew your fish together. Ours were hot-glued and it took Jillian approximately 30 seconds to rip them all apart (maybe I just have a particularly violent child?) This is fun, I'd love to hear the other activities you got in the swap.
ps- that first comment was deleted by me, the classic "accidentally commented as my husband"
I LOVE THAT MOVIE! I'm pretty sure my sisters and I said that line at least 5 times a day for 10 years. Pretty sure.
This is super cute!
I just did a busy bag exchange, too. (obviously Henry is not old enough for this stuff, but I like that I have activities on hand for him in a couple years)
These are so cute! They'd be great for the preschool Sunday school class.
Aw what a great movie! "You know what this is? Presidential flashcards?" Yay for the O-NEE-ders.
i LOVE "that thing you do!" 🙂
Very cute! Might have to make something like this for B. he would love it.
So glad you enjoyed your exchange! The person who made this for our exchange didn't secure the magnet well enough and it ripped off. I'm trying to come up with a new way to attach it that will be more secure!
These look awesome!
I'm glad I'm not the only one who caught the movie line. LOVE IT!